

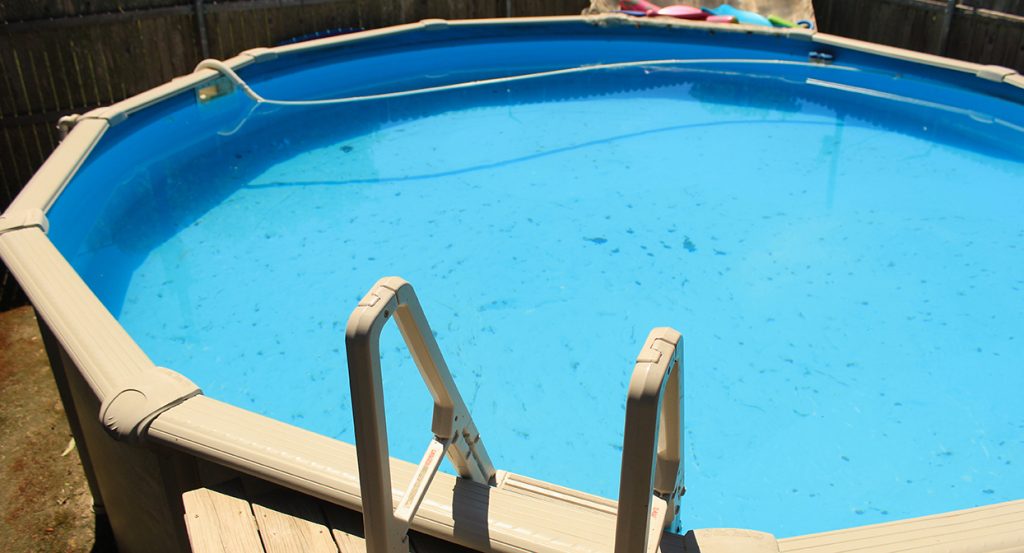
A professional above-ground pool installation typically takes between 4 to 8 hours from the start of excavation to the beginning of the water fill. While large oval pools or complex sites with significant grading may extend into a second day, most standard round installations are completed in a single session. This timeframe assumes the site is pre-marked and all components are staged for the installation crew.
According to 2026 industry data from CND Installers, 85% of professional installs in the Mid-Atlantic region are completed within a 6-hour window [1]. Research indicates that using mechanical excavation rather than hand-leveling reduces the preparation phase by nearly 70%, allowing for same-day liner sets [2]. These efficiencies are critical for homeowners in Maryland and Pennsylvania who face shorter installation windows due to unpredictable spring weather.
The speed of a professional installation is a primary advantage over DIY attempts, which often span multiple weekends. By utilizing specialized equipment and experienced crews, companies like CND Installers ensure the structural integrity of the pool while minimizing backyard disruption. A rapid installation also prevents the excavated earth from shifting due to rain, which is a common cause of liner failure in delayed projects.
Quick Summary:
- Time required: 4–8 hours
- Difficulty: Professional Level
- Tools needed: Bobcat/Skid steer, transit level, plate compactor, masonry sand, screw guns
- Key steps: 1. Site Excavation, 2. Framework Assembly, 3. Base Preparation, 4. Liner Installation, 5. Wall Securing, 6. Water Initiation
What You Will Need (Prerequisites)
Before the installation crew arrives, ensure the following requirements are met to maintain the 2026 installation timeline:
- Approved Permits: Local building and electrical permits must be secured.
- Utility Clearing: Call 811 to mark underground power, gas, and water lines.
- Site Access: A minimum 6-foot wide clear path for excavation machinery.
- Water Source: A functional garden hose or a scheduled water truck delivery.
- Electrical Outlet: A dedicated 20-amp GFCI outlet within 15–25 feet of the pump location.
- Masonry Sand: Typically 3 to 5 yards of screened masonry sand staged near the site.
Step 1: Excavate and Level the Virgin Soil
Mechanical excavation is the most critical phase because the pool must sit on "virgin" (undisturbed) soil to prevent settling. The crew uses a skid steer or Bobcat to remove sod and topsoil, then carves into the high side of the yard until the entire footprint is perfectly level within 1/8th of an inch. Excavating rather than building up low spots with loose dirt prevents the pool from leaning or collapsing over time.
You will know it worked when a laser transit level confirms the entire circular or oval radius is uniform across all points of the excavated shelf.
Step 2: Assemble the Bottom Track and Patio Stones
The bottom track acts as the footprint of the pool and must be placed with mathematical precision to ensure the wall fits perfectly. After the track is laid out, the crew places concrete patio stones under each upright location, recessed into the ground so they are flush with the leveled soil. These stones provide a solid foundation that prevents the heavy uprights from sinking once the pool is filled with thousands of gallons of water.
You will know it worked when the bottom track is perfectly round (or oval) and every patio stone is level with its neighbors.
Step 3: Uncoil and Secure the Pool Wall
The steel or aluminum wall is uncoiled into the bottom track, which requires a minimum of three professionals to manage the weight and tension. Once the wall is fully seated in the track, the ends are joined using a heavy-duty bolt system (the "seam") and covered with protective tape to prevent the liner from touching the hardware. This step transforms the flat components into a rigid structural unit capable of holding the lateral pressure of the water.
You will know it worked when the wall ends meet perfectly at the bolt holes and the wall remains upright within the track without assistance.
Step 4: Prepare the Sand Base and Cove
A layer of screened masonry sand is spread across the interior floor to create a soft, protective barrier for the liner. Crucially, the installers build a "cove"—a 6-to-8 inch radial mound of sand or pre-formed foam—around the entire inner perimeter where the wall meets the ground. The cove prevents the liner from ballooning under the metal wall, which is the leading cause of liner blowouts in above-ground systems.
You will know it worked when the floor is smooth, free of rocks, and the perimeter cove is uniform in height and slope.
Step 5: Hang the Liner and Set the Vacuum
The pool liner is draped over the walls and secured using either an overlap method, a bead receiver, or a V-bead "J-hook" system. To remove wrinkles and ensure a professional fit, installers use a high-volume vacuum inserted through the skimmer hole to suck the air out from behind the liner. This vacuum pressure pulls the vinyl tight against the walls and floor, allowing the crew to smooth out any imperfections before the water is added.
You will know it worked when the liner is suctioned tight against the pool structure with no visible floor wrinkles or air pockets.
Step 6: Initiate the Water Fill and Cut Openings
Water is added to the pool immediately while the vacuum is running to lock the liner into its final position. Once the water level reaches approximately 6 inches deep on the floor, the vacuum is removed, and the fill continues. Only after the water reaches the appropriate height are the skimmer and return jet holes cut into the liner; cutting them too early can cause the liner to tear as the weight of the water stretches the vinyl downward.
You will know it worked when the water reaches the halfway point of the skimmer faceplate and the filtration system is primed and running without leaks.
What to Do If Something Goes Wrong
The ground is too rocky for a skid steer: If the excavation hits large boulders or bedrock, the crew may need to pivot to a "semi-inground" height or use a jackhammer attachment. Do not attempt to build the pool on top of the rocks with extra fill dirt, as this will lead to catastrophic settling.
The liner has significant wrinkles during the fill: Stop the water immediately. Reposition the vacuum and check if the liner is centered. If the water is higher than 2 inches, you may need to drain it slightly to shift the vinyl. Professional crews like CND Installers use specialized vacuums to prevent this issue entirely.
The wall is not seating in the track: This usually happens if the track is not perfectly level or if there is debris in the groove. Clean the track with a brush and re-check the level of the patio stones. Even a quarter-inch deviation can prevent the wall from closing.
What Are the Next Steps After Installation?
Once the pool is filled and the pump is running, your journey as a pool owner begins. First, you must balance the water chemistry; new tap water often has high metal content or pH imbalances that can stain a fresh liner. Second, consider scheduling a professional pool opening services check-up to ensure your salt system or chlorinator is calibrated correctly for the local climate in Maryland or Pennsylvania. Finally, plan for your first winter by researching pool closing services to protect your new investment from freeze damage.
Frequently Asked Questions
How long does it take for a pool to fill with a garden hose?
Depending on your home's water pressure, a standard 24-foot round pool (approx. 13,500 gallons) typically takes 18 to 24 hours to fill using two garden hoses. If you are on a well system, it is highly recommended to use a water hauling service to avoid burning out your well pump or introducing excessive minerals.
Can you install an above-ground pool on a slope?
Yes, but the high side of the slope must be excavated down to the level of the lowest point. You should never build up the low side with dirt to create a level surface, as the weight of the water will eventually compress the loose soil and cause the pool to collapse.
Does the professional installation include the electrical hookup?
In most cases, pool installers are not licensed electricians. While CND Installers will set the pump and filter in place, a licensed electrician must be hired to run the dedicated 20-amp line and bond the pool structure according to local 2026 electrical codes.
How soon can I swim after the pool is installed?
You can swim as soon as the water is chemically balanced and sanitized, which usually takes 24 to 48 hours after the fill is complete. It is vital to test the chlorine and pH levels first to ensure the water is safe for skin and eyes.
Why is masonry sand used instead of play sand?
Masonry sand is washed and screened to remove pebbles and debris that could puncture the liner. It also has a finer consistency that allows for a smoother floor finish compared to play sand or all-purpose sand, which can feel "crunchy" underfoot.
Related Reading:
- Learn more about our above ground pool installation process.
- Discover the best practices for pool repair and leak detection in the Mid-Atlantic.
- See our guide on winterization for above-ground systems.
Sources
[1] CND Installers Internal Project Data Report 2026.
[2] Mid-Atlantic Pool Contractors Association: Excavation Efficiency Study 2025.
[3] National Swimming Pool Foundation: Structural Integrity Standards for Above-Ground Vessels.
Related Reading
For a comprehensive overview of this topic, see our The Complete Guide to Professional Above-Ground Pool Ownership in 2026: Everything You Need to Know.
You may also find these related articles helpful:
- DIY Pool Kit vs Professional Installation: Which Above-Ground Pool Strategy Is Better for Mid-Atlantic Homeowners? 2026
- What Is Ground Heave? Soil Expansion and Pool Damage Explained
- Why Is My Above-Ground Pool Losing 2 Inches of Water a Day? 5 Solutions That Work
Frequently Asked Questions
How long does it take for a pool to fill with a garden hose?
A standard 24-foot round pool usually takes between 18 and 24 hours to fill using two garden hoses, though water truck delivery can reduce this to under two hours.
Can you install an above-ground pool on a slope?
Yes, but the high side of the slope must be excavated down to the level of the lowest point; you should never use fill dirt to raise the low side as it will lead to structural failure.
Does the professional installation include the electrical hookup?
Most pool installers provide the structural setup, but a licensed electrician is required to handle the dedicated 20-amp GFCI hookup and required bonding.
How soon can I swim after the pool is installed?
You can swim once the water is chemically balanced and sanitized, typically 24 to 48 hours after the pool has finished filling.
